
Since I've had and responded to many requests to explain my "bahrman rails" system, I've been thinking about how best to present/explain the system to an interested group. So after a year of using the system, I am offering a step-by-step workshop / class to interested persons. Cost will be minimal, at $15 per person. This is an online class, so all the teaching will take place at your computer, and in your own working environment whatever that is.
Bahrman rails are so named because many people asked me if my board had Jensen rails, and I had to explain it was my own rail system. So to distinguish it from any other rail systems, I began calling it the bahrman rail system. I don't claim to have invented anything new, I haven't patented or copyrighted it, and don't doubt something very similar has been done by others before. In fact, I know one shaper who posts pics online has a similar system, 'tho not identical.

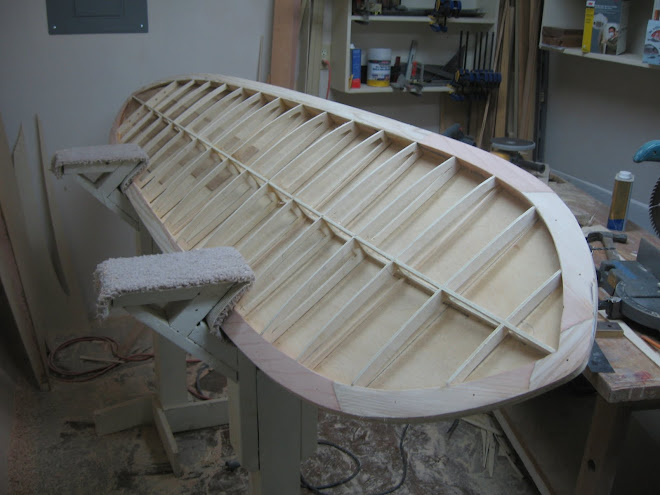
With the bahrman rail system, the rails can be built first, and the strength of the board is in the rails. The rails effectively become the perimeter stringer, and a very strong one at that. Because of this, the remainder of the board can be filled in with a variety of different methods. If you normally work with foam, you can build your board with foam. The method would work well with compsand, and is probably similar to many compsand boards being made today. If you like the "fish bones" method of most hollow wood surfboards, you can build accordingly. To test the structure, I even built a board just using the rails and a piece of plywood glued top and bottom, it works fine so far.
The weight of the rails is comparable to most wood rail systems, and is dictated largely by the wood chosen. Balsa or paulownia are probably the lightest, although I have always used 2x6 Calif. redwood, sometimes combined with 1x6 cedar, because they are available very inexpensively at my local big-box stores. I recommend using an inexpensive wood that is fairly light and easy to shape for your first time. Later, once the process is understood, you may go to more expensive woods if desired.
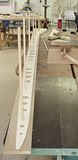
If you want to get experimental, this is a good method to know. Because the rails carry so much of the strength of the board, the options open up for the actual remaining structure. Use your imagination. Once you understand the system, you will see that it can be modified in numerous ways, and you can proceed to customize and experiment on personalizing the process on your own future builds. A rocker table is not required for this system, but a solid flat workbench top is. Also recommended is a good set of shaping racks, like shown in the bottom picture.
This is a solid rail system, that is carved or sanded to shape. To build the rails, you will probably want to use a handheld jigsaw (which is what I use) or a bandsaw (which I would use if I had one!). Clamps are helpful, although screws can be used instead, and then taken out once the glue dries. To shape the rails, a belt sander, 4" handheld grinder with sanding disc, and power planer may be used. Although they could be shaped without power tools (carved and sanded) if so desired. Although not difficult, if you are not comfortable with "shaping" your rails, this is probably not the system for you. And you should be aware that there is a certain amount of "waste" when carving or shaping, that differs from the minimal sanding required of rails built with strips.

$15 U.S. cost of class, no refunds for withdrawal. I will set it up so that payment may be made by PayPal, credit card, or you can send a money order by mail. Everyone will have access to a step-by-step detailed explanation of the process with accompanying pictures / drawings as needed. You can proceed at your own rate, but will be expected to keep your project moving forward on a regular basis.
Classes will be conducted through a private Delphi forum not open to the public, so you must join Delphi (free), and you must be able to post pics. A separate photo-hosting site is highly recommended - like flickr photobucket or picasa, (most are free), as Delphi picture size and space is very limiting, but with a separate photo hosting site, there are no limits. I cannot answer questions very well if I can't see a pic of your project, and I will expect every student to post pics of their progress. To see if you can use Delphi and post pics, you are welcome to try my free public Delphi forum Surfers Surfing Surfboards.
I will walk everyone who joins through the process. You must have a full-sized board template (plan shape) and rocker template (stringer shape) to proceed. Because this will be a group forum, we will learn from each other also, but without the distraction of outside observers and trolls.
Registration will be open until the end of the month. At the first of December, class will begin. What you will end up with is a wood surfboard perimeter rail. You can build your board using any method you want. While the class does not concern itself with the remainder of the build, I will answer questions and discuss the options for those who desire.
If you are interested, email me at doghousereilley@yahoo.com, and title your email "bahrman rails class"
- Huck

 Reefpoint Beach, sounds like a scenic slice of California coastline - but its really just a play on the three coastal conditions that produce rideable surf: Reef breaks, point breaks, and beach breaks.


.jpg)


